


Mitya in Genshin: Kit, Gameplay, Signature Weapon & Materials
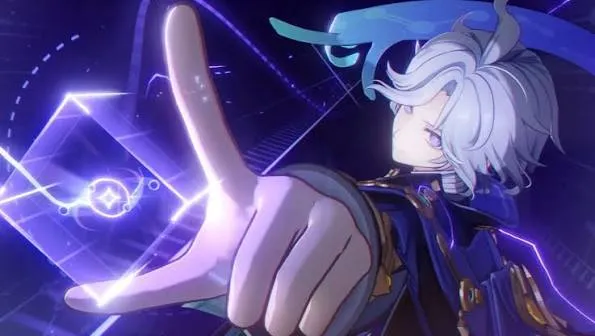
It didn't take long for Mitya to become one of Snezhnaya's most recognizable faces — the oversized scarf, the scientist energy, the dry sense of humor all did their part. Plenty of Travelers have already been won over by that blend of nerdy rambling and unexpectedly sharp moments.
Top‑up on WISHGM and enjoy great savings

 Up to 32% off on top‑ups
 Fast delivery within 3 mins
 Highly‑rated & trusted
 Secure transactions
With his playable kit falling into place, Mitya is shaping up as an Electro Catalyst character centered on Stellar-Conduct, and the bulk of his gameplay hinges on Polestar Prisms, Elemental Mastery, and his Energy Device.
Note: Everything here — Mitya's kit, weapon effects, multipliers, and materials — draws on pre-release data as it currently stands, so expect possible changes before release.
Mitya Overview

Rarity: 5-star • Element: Electro • Weapon: Catalyst
Mitya is a 5-star Electro Catalyst character, and Stellar-Conduct anchors everything his kit does. The Polestar Prisms he generates can be spent through his special Charged Attack or his Energy Device, converting into extra Stellar-Conduct DMG.
An Energy Device appears when Mitya uses his Elemental Skill, and what it does shifts with the mode you pick. One mode leans on automatic Prism consumption, turning them into reaction damage and team utility; the other lets Mitya do the spending himself through his special Charged Attack. Across the kit, Elemental Mastery matters — it shapes his personal Stellar-Conduct damage as well as the reaction damage he provides to the team.
Mitya Voice Actors
| Language | Voice Actor |
| English | Brian Ballance |
| Chinese | Su Shangqing |
| Japanese | Yusuke Kobayashi |
| Korean | Choi Woo-seong (최우성) |
Mitya Kit
Normal Attack
Mitya can perform as many as 3 Catalyst attacks, and the sequence deals Electro DMG.
His regular Charged Attack fires off after a brief casting time, unleashing AoE Electro DMG at the cost of Stamina.
Once the Energy Device is set to the required mode and at least one Polestar Prism is on hand, Mitya's Charged Attack shifts into Prism Detonation.
Prism Detonation:
- Consumes no Stamina.
- Deals an initial instance of AoE Electro DMG.
- Continuously consumes Polestar Prisms.
- Each consumed Prism deals additional AoE DMG counted as Stellar-Conduct reaction DMG.
Once Mitya reaches Talent Level 10, the special Charged Attack hits for 275.4% DMG, and every Prism contributes Stellar-Conduct DMG equal to 367.2% of Mitya's Elemental Mastery.
Elemental Skill
An Energy Device comes into being when Mitya deals Electro DMG. Which device mode appears depends on whether the Skill is tapped or held.
If a Polestar Prism is generated while the device sits in Stable Mode and Mitya is already at maximum capacity, the excess Prism is consumed, triggering Prism Surge for AoE Stellar-Conduct DMG.
Once the Stable Mode Energy Device vanishes, every Polestar Prism left over gets consumed, triggering Prism Shatter. The more Prisms consumed, the higher the damage it deals.
At Talent Level 10:
| Effect | Value |
| Tap Skill DMG | 163.3% |
| Hold Skill DMG | 233.3% |
| Stabilizer Pulse DMG | 129.6% |
| Prism Surge DMG | 172.8% EM |
| Prism Shard DMG per Prism | 207.4% EM |
| Energy Device Duration | 20s |
| CD | 15s |
Elemental Burst
An explosion set off by Mitya deals AoE Electro DMG, and 3 Polestar Prisms appears right away.
The goal behind it is simple — one big hit, plus a fast refill of the resource his remaining kit depends on.
At Talent Level 10:
- Skill DMG: 600.5% ATK + 1201% Elemental Mastery
- Polestar Prisms Generated: 3
- Cooldown: 15s
- Energy Cost: 60
Mitya's Passive Talents
Ascension Talent 1
Whichever Energy Device mode is currently active decides which effects Mitya gets.
Stable Mode: For every Prism in Mitya's possession, nearby party members all receive 30 Elemental Mastery.
Collapse Mode: Stellar-Conduct being triggered brings about 1 Polestar Prism to be generated every 1.5 seconds for 3 seconds.
Ascension Talent 2
A Polestar Prism, once collected, stays on the field for 10 seconds.
Mitya's CRIT Rate by 5% for 15 seconds also rises with each Prism you collect, and the effect can stack up to 4 times.
Mitya gains 20% CRIT Rate once the stacks hit their maximum. If the effect is triggered once more, its duration is refreshed.
Stellar-Conduct Passive
By triggering Superconduct, party members change the reaction into Stellar-Conduct.
His Elemental Mastery also determines how much Mitya boosts the party's Base Stellar-Conduct DMG:
1 Elemental Mastery = 0.028% Base Stellar-Conduct DMG
The highest value this bonus can reach is 14%.
Entering a Polestar Field also puts Mitya into the Radiance: Stellar-Conduct state.
Exploration Passive
A special Excavation Mode can be entered by Mitya's Stable Mode Energy Device in Voxelrock areas, allowing it to rapidly clear nearby Voxelrock.
With Mitya in the party, crafting a Prime Ice Construct Basic Heat Source also uses no power.

Mitya's Constellations
C1
The maximum amount of Polestar Prism Mitya can hold rises to 5.
An additional 1 Polestar Prism is generated when his Elemental Skill is used.
As long as the Energy Device remains active, whoever is currently active gains 50% CRIT DMG.
Consuming a Prism lets Mitya restore 10 Energy, and this Energy restoration can trigger only once every 8 seconds.
C2
Within the Energy Device's field, enemies have their Cryo RES and Electro RES reduced by 25%.
Depending on which mode it is in, the device also grants different Elemental Mastery buffs:
- Stable Mode: All party members gain 100 Elemental Mastery.
- Collapse Mode: The active character gains 200 Elemental Mastery.
C3
Mitya's Elemental Skill Level by 3 is increased.
Upgrade level cap: 15.
C4
Mitya unleashes one more instance of Stellar-Conduct DMG against enemies near the Energy Device for each 5 Polestar Prisms consumed.
Damage dealt by this attack is equal to 400% of Mitya's Elemental Mastery.
C5
Mitya's Normal Attack Level by 3 receives an increase.
Upgrades cap out at level 15.
C6
Each time Mitya uses his Energy Device to consume a Polestar Prism, a 30% chance to immediately generate another Prism occurs.
On top of that, Stellar-Conduct reaction DMG dealt by all party members is Elevated by 20%.
Mitya's Signature Weapon

Rarity 5-star; Base ATK sits at 542 , while CRIT DMG comes in at 88.2%.
CRIT DMG is increased by 24%.
Using their Elemental Skill grants the equipping character Formula Association, an effect that raises Elemental Mastery by 48 for 20s.
For the equipping character, Formula Dissociation builds up while this effect remains active — one stack is earned each time a party member who is nearby triggers an Elemental Reaction. Every stack adds another 24 to Elemental Mastery. When the triggered reaction is Stellar-Conduct, each Formula Dissociation stack also raises the Stellar-Conduct CRIT DMG of the equipping character by 12%. No more than 3 Formula Dissociation stacks can be gained during a single Formula Association, and existing effects are cleared first when their Elemental Skill is used.
Weapon Mats
| Material | Amount |
 Mora Mora | 225,000 |
 Ethereal Crystalscale Ethereal Crystalscale | 15/23/27 |
 Snowborn Heart of Ignorance Snowborn Heart of Ignorance | 23/27/41 |
 The Frost Emperor's Farewell The Frost Emperor's Farewell | 5/14/14/6 |
Ascension Materials for Mitya
Getting Mitya all the way up to Level 90 from Level 1 calls for the materials listed below:
| Material | Amount |
| Mora | 2,092,600 |
| Crystalfold | 168 |
 Wanderer's Advice Wanderer's Advice | 3 |
 Hero's Wit Hero's Wit | 418 |
 Vajrada Amethyst Sliver Vajrada Amethyst Sliver | 1 |
 Vajrada Amethyst Fragment Vajrada Amethyst Fragment | 9 |
 Vajrada Amethyst Chunk Vajrada Amethyst Chunk | 9 |
 Vajrada Amethyst Gemstone Vajrada Amethyst Gemstone | 6 |
 Chimeric Core Chimeric Core | 18 |
 Symbiotic Chimeric Nucleus Symbiotic Chimeric Nucleus | 30 |
 Prime Chimeric Nexus Prime Chimeric Nexus | 36 |
 Shattered Stabilizing Anchor Shattered Stabilizing Anchor | 46 |
Talent Materials for Mitya
Taking all three Talents from Level 1 to Level 10 requires:
| Material | Amount |
| Mora | 4,957,500 |
 Crown of Insight Crown of Insight | 3 |
 Teachings of Charity Teachings of Charity | 9 |
 Guide to Charity Guide to Charity | 63 |
 Philosophies of Charity Philosophies of Charity | 114 |
| Chimeric Core | 18 |
| Symbiotic Chimeric Nucleus | 66 |
| Prime Chimeric Nexus | 93 |
 Mask of the Virtuous Doctor Mask of the Virtuous Doctor | 18 |
Final Thoughts
Nearly everything in Mitya's current kit revolves around Stellar-Conduct, Elemental Mastery, and Polestar Prism management. Switching between reaction support and a more active on-field damage role is possible thanks to his Energy Device, and his constellations raise the ceiling on both his own output and the buffs he hands to the team.
Remember that a beta kit is never final, so the numbers and effects shown here can still shift. From there, the focus turns to building around the kit — the weapons, artifacts, main stats, and teammates that suit him best.
As soon as more Mitya details surface, this guide will be updated.